django-bootstrap-datepicker-plus documentation
This django widget contains Bootstrap 3, Bootstrap 4 and Bootstrap 5 Date-Picker, Time-Picker, DateTime-Picker, Month-Picker and Year-Picker input with date-range-picker functionality for django version >= 1.8. The widget implements bootstrap-datetimepicker v4 to show bootstrap-datepicker in django model forms and custom forms which can be configured easily for date-range selection.


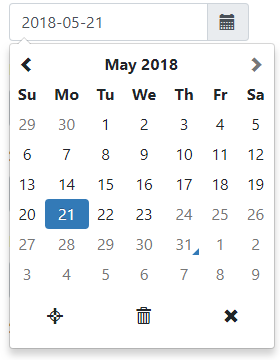
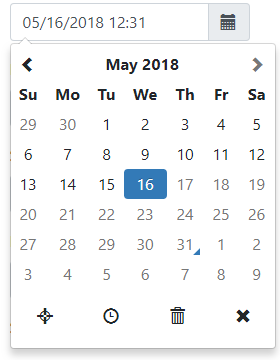
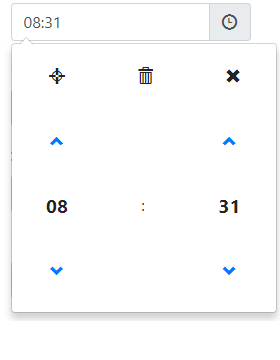
Demo
Getting Started
Prerequisites
- Python >= 3.6
- Django >= 1.8
- Bootstrap >= 3
- jquery >= 1.7.1
Installing
Install the widget via pip
pip install django-bootstrap-datepicker-plus
Add bootstrap_datepicker_plus to the list of INSTALLED_APPS in your settings.py file.
INSTALLED_APPS = [
# Add the following
'bootstrap_datepicker_plus',
]
Warning
This installation instruction assumes you have jQuery and Bootstrap JS/CSS files present
in your template and you are using form.media in your django template. If not you should checkout our
configuration instructions
which covers almost everything you need to get the widget running.
Quick Walkthrough Tutorial
This tutorial will take off where django official tutorial Writing your first Django app, part 4 left off. If you don’t have the project you can clone the following repository and checkout to completion of tutorial 04.
git clone https://github.com/monim67/django-polls
cd django-polls
git checkout d2.1t4
The Question model has a datetime field. We are going to create a page to add new poll questions and a page to edit them with a date-time-picker calendar on the datetime field. We are going to use Bootstrap 4 here, if you are using Bootstrap 3 just replace the 4’s with 3’s in the codes and instructions below. Install following packages:
pip install django-bootstrap4
pip install django-bootstrap-datepicker-plus
Add these packages to the list of INSTALLED_APPS as you did here on Tutorial 02.
# file: mysite/settings.py
INSTALLED_APPS = [
'polls.apps.PollsConfig',
'django.contrib.admin',
'django.contrib.auth',
'django.contrib.contenttypes',
'django.contrib.sessions',
'django.contrib.messages',
'django.contrib.staticfiles',
"bootstrap4",
"bootstrap_datepicker_plus",
]
CreateView for Question model
Add a CreateView for Question model. The get_form method is used to specify widgets on the form fields.
# file: polls/views.py
from django.http import HttpResponseRedirect
from django.shortcuts import get_object_or_404, render
from django.urls import reverse
from django.views import generic
from bootstrap_datepicker_plus.widgets import DateTimePickerInput
from .models import Choice, Question
class CreateView(generic.edit.CreateView):
model = Question
fields = ['question_text', 'pub_date']
def get_form(self):
form = super().get_form()
form.fields['pub_date'].widget = DateTimePickerInput()
return form
# Leave other classes unchanged
Create a template named question_form.html in your app to render the form. If you use a different name you have to set template_name property of CreateView class in your views.py file above.
<!-- file: polls/templates/polls/question_form.html -->
{% load bootstrap4 %}
{% bootstrap_css %}
{% bootstrap_javascript jquery='full' %}
{{ form.media }}
<form method="post">{% csrf_token %}
{% bootstrap_form form %}
<input type="submit" value="Save">
</form>
Add a get_absolute_url method to your Question model.
# file: polls/models.py
import datetime
from django.db import models
from django.urls import reverse
from django.utils import timezone
class Question(models.Model):
question_text = models.CharField(max_length=200)
pub_date = models.DateTimeField('date published')
def __str__(self):
return self.question_text
def was_published_recently(self):
return self.pub_date >= timezone.now() - datetime.timedelta(days=1)
def get_absolute_url(self):
return reverse('polls:detail', kwargs={'pk': self.pk})
Add an urlpattern for creating new poll question.
# file: polls/urls.py
from django.urls import path
from . import views
app_name = 'polls'
urlpatterns = [
path('', views.IndexView.as_view(), name='index'),
path('create', views.CreateView.as_view(), name='create'),
path('<int:pk>/', views.DetailView.as_view(), name='detail'),
path('<int:pk>/results/', views.ResultsView.as_view(), name='results'),
path('<int:question_id>/vote/', views.vote, name='vote'),
]
Now run the developement server and visit http://localhost:8000/polls/create, if everything works fine you can wrap up your template in proper HTML.
<!-- file: polls/templates/polls/question_form.html -->
<!DOCTYPE html>
<html lang="en">
<head>
<meta charset="UTF-8">
<meta name="viewport" content="width=device-width, initial-scale=1.0">
<meta http-equiv="X-UA-Compatible" content="ie=edge">
<title>Document</title>
{% load bootstrap4 %}
{% bootstrap_css %}
{% bootstrap_javascript jquery='full' %}
{{ form.media }}
</head>
<body>
<div class="container">
<div class="col-md-3">
<form method="post">{% csrf_token %}
{% bootstrap_form form %}
{% buttons %}
<button type="submit" class="btn btn-primary">Save</button>
{% endbuttons %}
</form>
</div>
</div>
</body>
</html>
UpdateView for Question model
We can now add a page to update a poll question. First we add an UpdateView to our views.
# file: add these to polls/views.py
class UpdateView(generic.edit.UpdateView):
model = Question
fields = ['question_text', 'pub_date']
def get_form(self):
form = super().get_form()
form.fields['pub_date'].widget = DateTimePickerInput()
return form
Then add a urlpattern to access the question update page.
# file: polls/urls.py
from django.urls import path
from . import views
app_name = 'polls'
urlpatterns = [
path('', views.IndexView.as_view(), name='index'),
path('create', views.CreateView.as_view(), name='create'),
path('<int:pk>/', views.DetailView.as_view(), name='detail'),
path('<int:pk>/update', views.UpdateView.as_view(), name='update'),
path('<int:pk>/results/', views.ResultsView.as_view(), name='results'),
path('<int:question_id>/vote/', views.vote, name='vote'),
]
That’s it, run the developement server and visit http://localhost:8000/polls/1/update, if everything works fine you can checkout usage in custom form and model form in Usage page of the docs.
Usage
Usage in Generic View
# File: views.py
from bootstrap_datepicker_plus.widgets import DateTimePickerInput
from django.views import generic
from .models import Question
class CreateView(generic.edit.CreateView):
model = Question
fields = ['question_text', 'pub_date']
def get_form(self):
form = super().get_form()
form.fields['pub_date'].widget = DateTimePickerInput()
return form
Custom Form usage
# File: forms.py
from bootstrap_datepicker_plus.widgets import DatePickerInput
from .models import Event
from django import forms
class ToDoForm(forms.Form):
todo = forms.CharField(
widget=forms.TextInput(attrs={"class": "form-control"})
)
date = forms.DateField(
widget=DatePickerInput(format='%m/%d/%Y')
)
Model Form usage
# File: forms.py
from bootstrap_datepicker_plus.widgets import DatePickerInput
from .models import Event
from django import forms
class EventForm(forms.ModelForm):
class Meta:
model = Event
fields = ['name', 'start_date', 'end_date']
widgets = {
'start_date': DatePickerInput(), # default date-format %m/%d/%Y will be used
'end_date': DatePickerInput(format='%Y-%m-%d'), # specify date-frmat
}
Types of DatePickers
The widget contains all types of date-picker you may ever need.
# File: forms.py
from bootstrap_datepicker_plus.widgets import DatePickerInput, TimePickerInput, DateTimePickerInput, MonthPickerInput, YearPickerInput
from .models import Event
from django import forms
class EventForm(forms.ModelForm):
class Meta:
model = Event
fields = ['start_date', 'start_time', 'start_datetime', 'start_month', 'start_year']
widgets = {
'start_date': DatePickerInput(),
'start_time': TimePickerInput(),
'start_datetime': DateTimePickerInput(),
'start_month': MonthPickerInput(),
'start_year': YearPickerInput(),
}
Implement date-range-picker
DatePickers can be linked to select a date-range or time-range.
# File: forms.py
from bootstrap_datepicker_plus.widgets import DatePickerInput, TimePickerInput
from .models import Event
from django import forms
class EventForm(forms.ModelForm):
class Meta:
model = Event
fields = ['name', 'start_date', 'end_date', 'start_time', 'end_time']
widgets = {
'start_date':DatePickerInput().start_of('event days'),
'end_date':DatePickerInput().end_of('event days'),
'start_time':TimePickerInput().start_of('party time'),
'end_time':TimePickerInput().end_of('party time'),
}
Customize Datepicker Options
The DatePicker can be customized by passing options to it.
The options will be passed to the JavaScript datepicker instance, and are documented and demonstrated in
Bootstrap Datepicker Options Reference.
# File: forms.py
from bootstrap_datepicker_plus.widgets import DatePickerInput
from .models import Event
from django import forms
class EventForm(forms.ModelForm):
class Meta:
model = Event
fields = ['name', 'start_date', 'end_date']
widgets = {
'start_date': DatePickerInput(format='%m/%d%Y'), # python date-time format
'end_date': DatePickerInput(
options={
"format": "MM/DD/YYYY", # moment date-time format
"showClose": True,
"showClear": True,
"showTodayButton": True,
}
),
}
Note: You can specify the date-time format by passing a python date-time format as format parameter (see start_date in the example), or by passing a moment date-time format as an option (see end_date in the example). If both are specified then the moment format in options will take precedence.
Customize DatePicker Format
In order to use arbitraty formats you must specify the pattern to the field’s input_formats and the widget’s format.
# File: forms.py
from bootstrap_datepicker_plus.widgets import DatePickerInput
from .models import Event
from django import forms
class ToDoForm(forms.Form):
todo = forms.CharField(
widget=forms.TextInput(attrs={"class": "form-control"})
)
date = forms.DateField(
input_formats=['%d/%m/%Y'],
widget=DatePickerInput(format='%d/%m/%Y')
)
Customize the Language
The DatePicker language can be customized by passing a locale option to datepicker input.
See moment.js locales for valid locales.
# File: forms.py
from bootstrap_datepicker_plus.widgets import DatePickerInput
from .models import Event
from django import forms
class EventForm(forms.ModelForm):
class Meta:
model = Event
fields = ['name', 'pub_date']
widgets = {
'pub_date': DatePickerInput(
options={
"format": "MM/DD/YYYY",
"locale": "bn",
}
),
}
Template Customizing
The calendar is not yet available for customizing, but the input field template can be customized. You can use a custom template for the input field to render.
# File: forms.py
from bootstrap_datepicker_plus.widgets import DatePickerInput
from django import forms
class MyDatePickerInput(DatePickerInput):
template_name = 'my_app/date-picker.html'
class ToDoForm(forms.Form):
date = forms.DateField(
widget=MyDatePickerInput(format='%m/%d/%Y')
)
Now you have to create a HTML template for date-picker input.
<!-- File: my_app/templates/my_app/date-picker.html -->
<h5>This is a customized date-picker</h5>
<div class="input-group date my-custom-class">
{% include "bootstrap_datepicker_plus/input.html" %}
<div class="input-group-addon input-group-append">
<div class="input-group-text"><i class="glyphicon glyphicon-calendar"></i></div>
</div>
</div>
You can also create a template for TimePickerInput and create a custom time-picker input.
<!-- File: my_app/templates/my_app/time-picker.html -->
<h5>This is a customized time-picker</h5>
<div class="input-group date my-custom-class">
{% include "bootstrap_datepicker_plus/input.html" %}
<div class="input-group-addon input-group-append">
<div class="input-group-text"><i class="glyphicon glyphicon-time"></i></div>
</div>
</div>
TroubleShooting
If the date-picker calendar does not show up, possibility is you missed something of the installation procedure. Check out the following errors and you might find your solution.
Errors displayed on browser screen
Error
TemplateSyntaxError: bootstrap3/4 is not a registered tag library.
This means you did not install django-bootstrap3 and add it to the list of INSTALLED_APPS. Checkout our configuration instructions to see how to do it.
Error
TemplateDoesNotExist bootstrap_datepicker_plus/date-picker.html
This means you did not install django-bootstrap-datepicker-plus and add it to the list of INSTALLED_APPS. Checkout our configuration instructions to see how to do it.
Error
TemplateSyntaxError: Invalid block tag ‘bootstrap_form’.
You have not loaded bootstrap3/bootstrap4 tag. Checkout our configuration instructions to see how to do it.
Errors displayed on browser console
Sometimes the page loads just fine, but errors are logged into browser’s developer console.
Error
Uncaught TypeError: Cannot read property ‘fn’ of undefined
Error
Uncaught Error: Bootstrap’s JavaScript requires jQuery
Error
Uncaught ReferenceError: jQuery is not defined
Error
Uncaught bootstrap-datetimepicker requires jQuery to be loaded first
The above errors are listed in the console if you forget to add jQuery to your template. Bootstrap’s JavaScript should be preceded by jQuery, otherwise Bootstrap will throw an error. Checkout our configuration instructions to see various options to do it.
Error
Uncaught TypeError: Cannot read property ‘Constructor’ of undefined
You forgot to add bootstrap JavaScript file to your template, make sure you have both Bootstrap JavasScript and CSS files to your included in your template. Checkout our configuration instructions to see various options to do it.
Fix 404 (Not Found) errors
Error
GET http://.../datepicker-widget.js net::ERR_ABORTED 404 (Not Found)
Error
GET http://.../datepicker-widget.css net::ERR_ABORTED 404 (Not Found)
In some production environment you need to collect static JS/CSS resources from all packages to a single
location specified as STATIC_ROOT in settings.py file. Check your hosting provider manual to see how
to do it correctly.
Otherwise if your hosting interface provides access to console, log in to your server console and run the following command and then reload the server from your hosting interface.
python3 manage.py collectstatic
Error
You’re using the staticfiles app without having set the STATIC_ROOT setting to a filesystem path
If you encounter above error then you don’t have STATIC_ROOT directory set. Check your hosting provider
instruction manual to identify the directory it serves static files from, generally it’s the static
directory in your prject root. If so add the following line at the bottom of your settings.py file.
STATIC_ROOT = os.path.join(BASE_DIR, "static")
Now you can execute collectstatic command and reload the server from your hosting interface.
No errors anywhere, but the calendar does not show up!
You forgot to add {{ form.media }} to your template. Checkout our configuration instructions
to learn more about this issue.
My error is not listed here
Please create an issue on the project’s GitHub repository providing as much information you can.
Contributing
Acknowledgments
This project implements Eonasdan/bootstrap-datetimepicker to display date-pickers. The project was initially forked from pbucher/django-bootstrap-datepicker.